Paul Grave’s blog

Using AI to design an indoor bike workout

Screenshot from intervals.icu of a bike workout

Today I planned to do a 2hr indoor workout. The previous day rode in ERG mode for 2 hrs at a fixed power of 181 W. It was pretty boring. To alleviate the boredom, I thought I could do with a workout that had variable levels of intensity and duration. I had a quick look in my workout library in Training Peaks and couldn’t immediately find anything that fit my requirements. Then I wondered whether I could use AI to design a workout for me 🤔

When I prescribe myself workouts, I use intervals.icu. Their workout builder works perfectly for my software engineer mind. Conveniently, workouts are automatically synced to Garmin. There’s no GUI; workout creation is driven by lines of text. This is what a basic 3-step workout might look like:

- 10m 50-60%
- 20m 70%
- 10m 40-60%

The format is - <duration> <intensity>, duration almost explains itself. Intensity can be a percentage of FTP or zones or ranges thereof e.g., Z1-Z2 or 60-70%

My next step was to find some AI to create my workout. I use Kagi and it comes with an AI assistant. Perfect. The default AI was Claude 3.5 Sonnet. Not sure how GPT 4o would have fared.

The first step is to give the AI some basic background info about how to create an Intervals.icu work:

You are a workout creator for indoor bike workouts. Bike workouts are specified using bullit points, using time in the format of duration followed by h for hours, m for minutes or s for seconds, the second value is percentage of FTP e.g., - 10m 65-75%.

The AI response was:

Claude 3.5 Sonnet I'll help you create indoor bike workouts. I understand you want the format to be: - Duration (using h/m/s) - Intensity (as % of FTP)

Would you like me to create a specific type of workout (endurance, intervals, threshold, etc.) or would you like me to specify the intended duration of the workout? This will help me create a more appropriate training session.

For reference, typical intensity zones for cycling are:

  • Recovery: 45-55% FTP
  • Endurance: 56-75% FTP
  • Tempo: 76-87% FTP
  • Threshold: 88-95% FTP
  • VO2 Max: 96-105% FTP
  • Anaerobic: 106%+ FTP

Please let me know your preferences and I’ll create a structured workout accordingly.

Now to tell it what sort of workout I want:

I want a 2hr workout at an endurance level. My FTP is 272. Total TSS should be no more than 100. Intervals should be of variable length, and variable intensity.

The response was:

Claude 3.5 Sonnet I'll create a 2-hour endurance workout with variable intervals while keeping the TSS under 100. Since your FTP is 272W, I'll focus on the endurance zone (56-75% FTP) with some tempo work mixed in to add variety while maintaining the TSS target.

Workout Structure:

  • 10m 55-65% (Warm-up)
  • 15m 65-70%
  • 8m 75%
  • 12m 65%
  • 20m 70-75%
  • 5m 60% (Recovery)
  • 15m 75%
  • 10m 65%
  • 12m 72%
  • 8m 60% (Recovery)
  • 10m 75%
  • 5m 65%
  • 5m 60% (Cool-down)

Total time: 2 hours (120 minutes) Primary intensity: Endurance zone (56-75% FTP) Power ranges:

  • 55% = 150W
  • 75% = 204W

This workout maintains a predominantly endurance-focused structure with varying intervals to keep engagement while preventing monotony. The intensity changes are gradual to maintain aerobic development, and recovery periods are strategically placed. The TSS should fall between 85-95 depending on how closely you stick to the prescribed power ranges.

That looks pretty good but when I pasted it into intervals.icu I noticed the intensity was slightly higher than I wanted:

Can you reduce the overall intensity from 68% to 65%?

The adjusted workout was perfect. Loaded it into [intervals.icu](https://intervals.icu), it sync’d to Garmin and I used my Garmin Edge 840 to control my trainer.

Claude 3.5 Sonnet I'll adjust the workout to average around 65% FTP instead of 68%, which means working primarily in the 60-70% range with fewer periods at 75%.

Workout Structure:

  • 10m 55-65% (Warm-up)
  • 15m 60-65%
  • 8m 70%
  • 12m 65%
  • 20m 65-70%
  • 5m 60% (Recovery)
  • 15m 70%
  • 10m 65%
  • 12m 65%
  • 8m 60% (Recovery)
  • 10m 70%
  • 5m 65%
  • 5m 60% (Cool-down)

Total time: 2 hours (120 minutes) Primary intensity: Lower endurance zone (60-70% FTP) Power ranges:

  • 55% = 150W
  • 70% = 190W

This revised version maintains the same structure but reduces the overall intensity by:

  • Lowering the 75% intervals to 70%
  • Reducing some of the 65-70% ranges to 60-65%
  • Keeping recovery intervals the same for adequate rest

The TSS will now be lower, approximately 75-85, making it a more moderate endurance-building session.


Thoughts on the new Reeder app

The first thing I tried to do in the new Reeder app was to try to add my Feedbin account. I couldn’t. I wondered whether it was hidden somewhere in the new UI or perhaps it was behind an in-app purchase. It was neither, adding Feedbin and other similar services was intentionally deprecated. Whilst I’m still not sure that this change is the best fit for my needs, this could be make the on-boarding experience far easier for new users.

I exported an OPML file from Feedbin and imported it into new Reader, and I now have something that’s similar to what I had in Reeder Classic.

Another controversial change will inevitably be the move to subscription pricing. £1 per month or £10 for 12 months. I prefer this for two reasons 1) it’s a small investment to try out the full version. All the features for one month for only £1, and if I don’t like it I can cancel the subscription 2) the subscription model gives the developer a consistent income which makes me feel like the app is less likely to become abandonware at some point.

Overall it looks like a very promising new app. I’m going to give it a go and see if I prefer it over Reeder Classic.


Faster web searches with Spotlight

I’ve discovered a faster way to search the web on macOS. It removes the step of opening the default browser.

  1. CMD+Space to open Spotlight
  2. Enter search keywords in Spotlight
  3. Press CMD+B to search in your default browser

I’m not sure there’s a quicker way to perform a search.


Setting heart rate zones on your Garmin watch or device

I see lots of people struggling to set their HR zones on their Garmin watches and this leads to all manner of weird issues. Setting zones should be simple.

First off, what not to do? I would caution against using 220-age to find your max HR. I think that formula may work well for studying large groups of individuals but I suspect doesn’t work well for individuals. Much like BMI.

Max HR or Lactate threshold HR? I think finding max HR is problematic. Max HR will change depending on your training status. If you’re at the end of a heavy block of training, you may not be able to achieve max HR. Finding your max HR isn’t pleasant either. I think it’s better to use LTHR, in my experience, it doesn’t vary much. Most importantly, I think LTHR is more useful, it’s the threshold beyond which your rate of fatigue increases.

Step 1 — determine your LTHR

Joel Friel provides good advice for establishing your LTHR.

To find your LTHR do a 30-minute time trial all by yourself (no training partners and not in a race). Again, it should be done as if it were a race for the entire 30 minutes.

at 10 minutes into the test, click the lap button on your heart rate monitor. When done, look to see what your average heart rate was for the last 20 minutes. That number is an approximation of your LTHR.

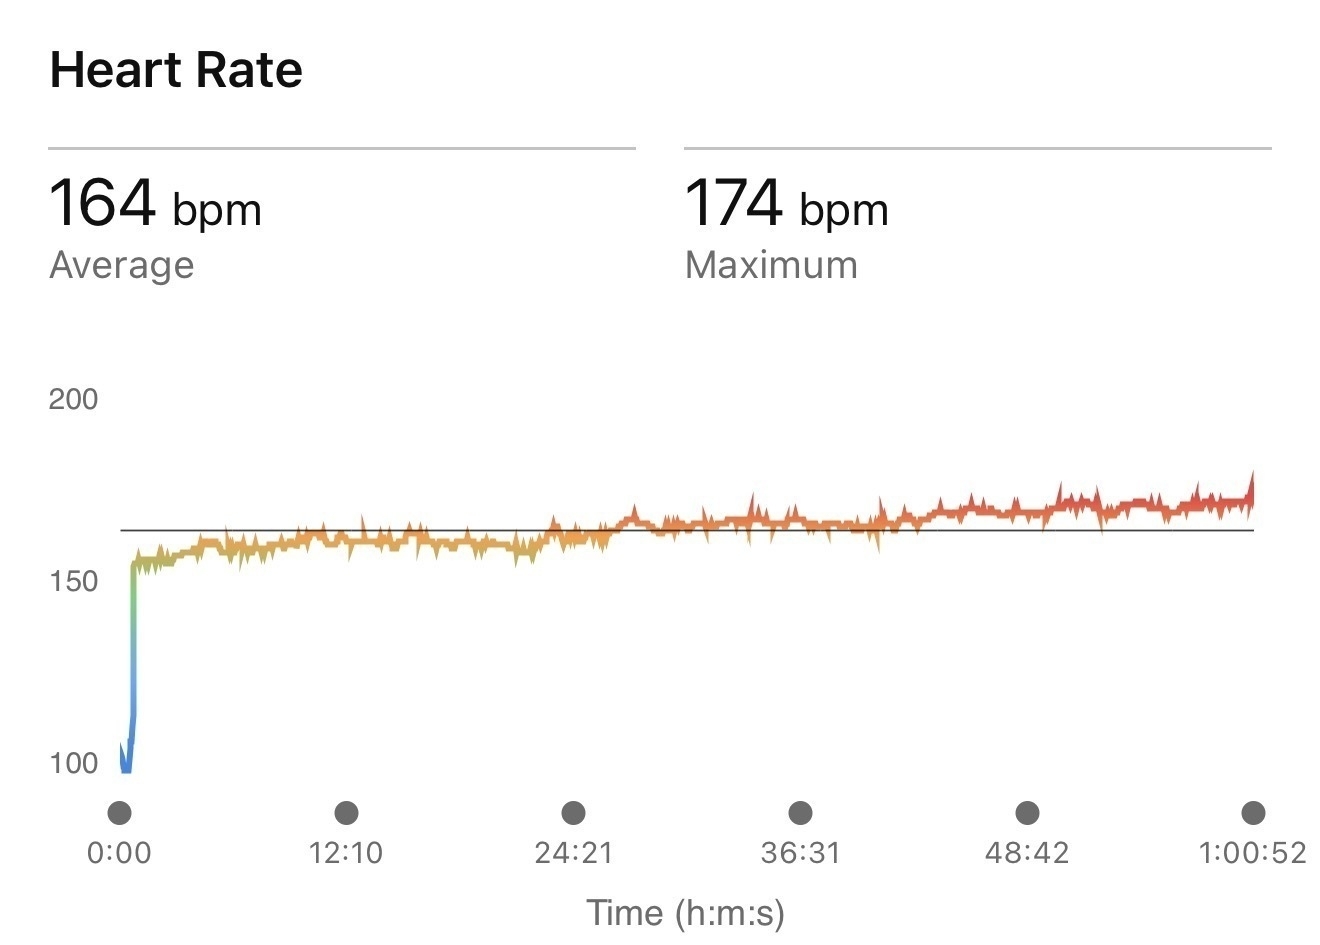
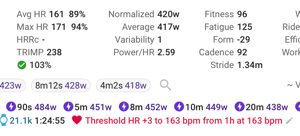
This weekend I ran the Leeds Half-Marathon. My average HR for the 85 minutes was 161bpm. I could use that as my LTHR or I could let intervals.icu tell me, which it did. I think either value would work fine.

Screenshot of Weather Up’s widget

Step 2 — personalise your zones

Then I use Garmin Connect to set my zones in my device’s user profile.

My zones happen to be:

  • Z1 -73%
  • Z2 74-86%
  • Z3 87-97%
  • Z4 98-100%
  • Z5 101-

Zone 2 is where I spend most of my training time and is the most important one for me. I did tweak my Z2 range from the defaults. 74-86% of 163 is 120-140bpm and I know I’m still able to breathe easily and have a conversation in this zone.

That’s all there is to it when setting heart rate zones.


Weather Up 3.0 review

I’ve been a long time Carrot user but decided to give Weather Up 3.0 a try after hearing the developer on The Talk Show podcast and reading about Weather Up on Daring Fireball.

The widget is information rich and I prefer it over any of Carrot’s widgets. The app isn’t as feature-rich as Carrot’s and it has a few things that are jarring.

Screenshot of Weather Up’s widget

If you’re not from the US you might be wondering if this app is for me. On the first opening, you will notice that the default cities are all US cities. Time formatting is hardcoded to 12h (you can’t change it, you’re stuck with it) and temperature defaults to Fº. The app does provide its own setting to switch from Fº to Cº but I don’t understand why the developer couldn’t the temperature units defined in iOS’s regional settings. Even the search skews towards US cities.

Count the US flags. Screenshot of the search screen from Weather Up 3.0
Helpful for discovering if your city exists in the US.

I sent feedback regarding the time issue to the developer and it took a month to receive a response. Since the app’s release 3 months ago there have been 2 minor updates.

It’s a good app. It would be great if the issues above could be addressed. It’s a shame I can’t tell if the app is still in active development.

For now I’m going to stick with Carrot. I really liked Weather Up’s widget. It did provide value but not sufficient enough to justify £40 pa. or £4 pcm.


Curve stopped working

I previously mentioned how to setup Garmin Pay with any UK bank card using Curve.

I setup both a debit card and my credit card with Curve and about a week ago Curve started blocking all transactions. The other issue is that I can’t add Curve to anymore of my Apple Pay—supporting devices either.

Looking at the recents reviews in the App Store, I’m not the only one who has experienced this problem.

In addition to the card not functioning as a card, the support is non-existant.

I paid £6 for a week of using Curve. I’m kinda glad that’s the extent of my loss.

On the basis of the lack of support, I would recommend no one use Curve. Stay away.


Setting up Garmin Pay with any UK bank or credit card

UPDATE Monzo is now supported by Garmin Pay.

UPDATE Don’t use Curve.

Garmin Pay, unlike Apple Pay, is not widely supported in the UK. Apple Pay in the UK is supported by over 150 financial institutions. Garmin Pay is supported by 12. Apple Pay is one of my favourite features on Apple Watch.

I wanted to make the switch to my new Garmin Epix Gen2 Pro as smooth as possible and I was worried that I was going to miss out on the ability to pay for goods with my watch.

There’s a way around Garmin Pay’s poor support. Curve. Curve is a service that acts as a proxy for your various credit and debit cards. You add your cards to Curve. Add Curve to your Garmin watch. Then pay for goods with your Garmin Watch. Curve then works out which card to use.

Setting up Curve was simple with their iOS app. You have an account set up in about 5mins and then all that’s left to do is to add Curve to Garmin Pay.

Paying with an Apple Watch is a case of double-clicking the side button. It’s a shame that Garmin’s default isn’t as slick. You have to hold the light button, enter the controls menu, and press up/down multiple times to find the wallet icon. Garmin lists 7 separate steps in the Epix manual. There is an easier way. I configured a Hot Key so that a long press on START opens Garmin Pay. That’s one step instead of 7.

Curve has a couple of interesting features that I want to explore further. The first one is Smart Rules. You can configure one or two rules (you have to pay for more) to determine which cards will be used for payment. The second is Anti-Embarrassment Mode, where you can use a backup card if your Monzo account is empty.

Over the past week I’ve been using Garmin Pay with the Garmin Epix and the experience has been on a par with Apple Pay, which is all I would have wanted.


Castletown Harbour near Dunnet Beach

Boat with Scottish beach in the background

Missing Patagonia

One of my favourite places in the world. Remote and beautiful.

Photo of a glaciar

Travelling in Argentina Pt. 3 — Hiking in Patagonia

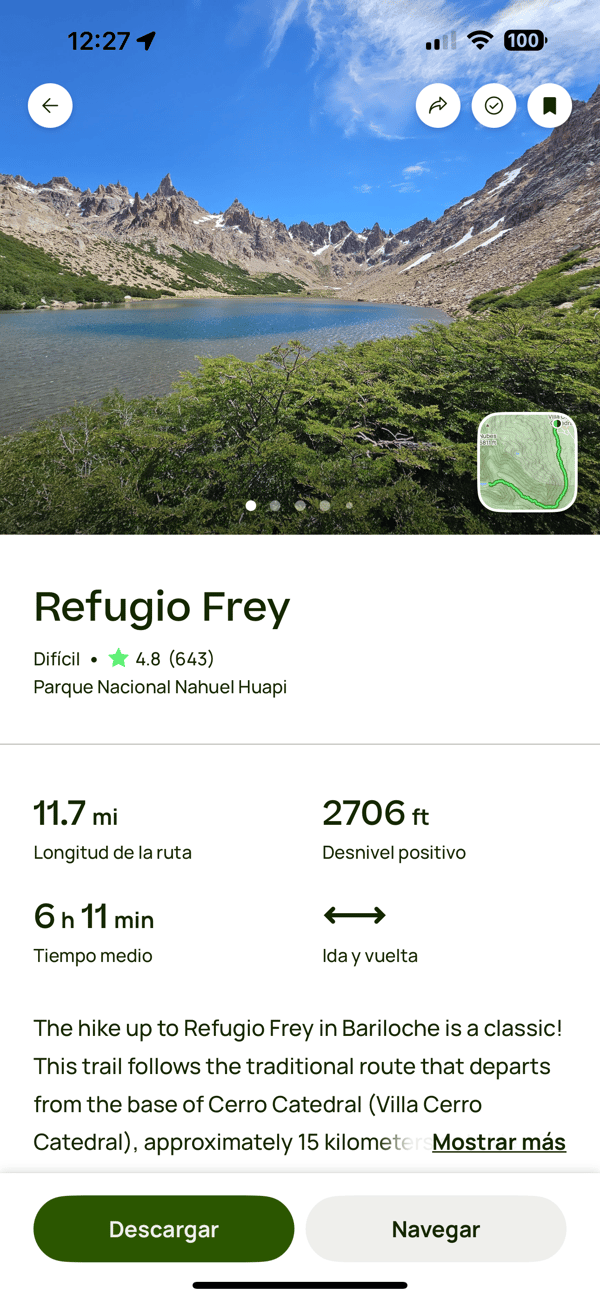
Whilst in El Chalten and Bariloche I knew we wanted to do hikes. Over the 4 days of hiking, I used a combination of apps to help us enjoy our hikes. I’ve listed the 3 below and described what I liked about each of them.

My requirements were:

  • Trail discovery. I wanted to find the best trails and maximise our time.
  • Downloadable maps. I wasn’t sure I’d have any network coverage
  • Works on both iPadOS and iOS. I wasn’t going to take my laptop with me. Planning on the iPad is easier than on the phone.

My requirements didn’t include navigation or recording since my Garmin Instinct series 2 would cover this.

Gaia GPS

App Store link

Gaia Screenshot

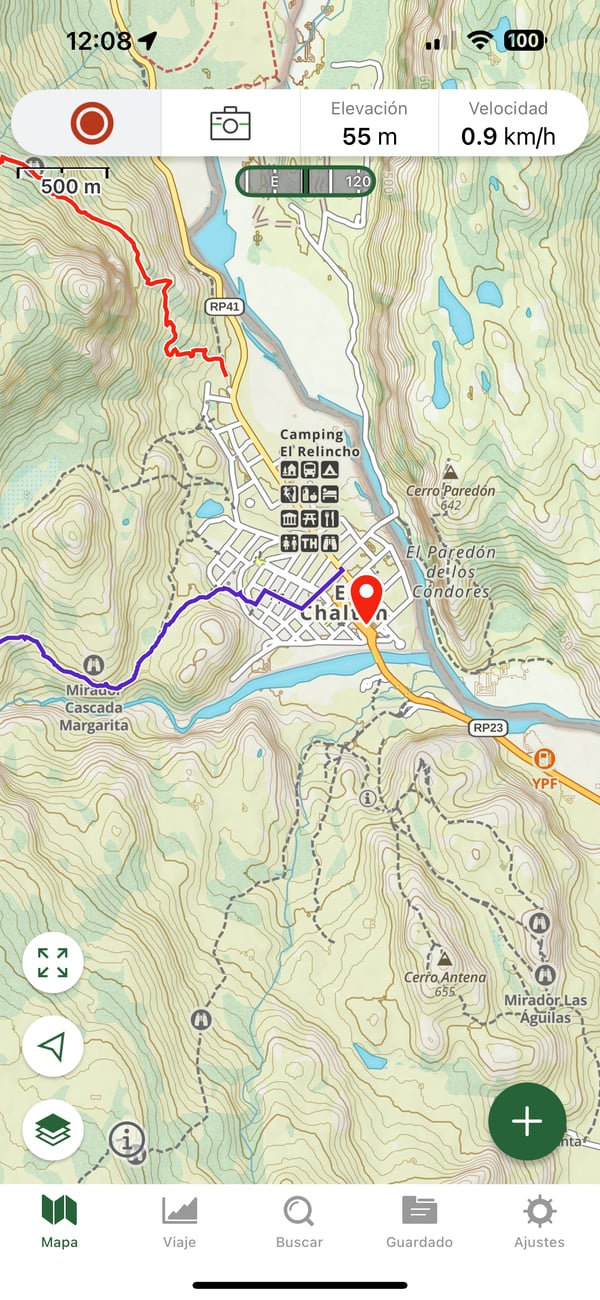
Gaia has the prettiest maps out of the three apps I tried. I downloaded maps for El Chalten, El Calafate, and Bariloche. Whilst the UI for downloading was clunky, it worked. Gaia offered an iPadOS version and a web version for its maps.

I found Gaia easy to use and reliable during hikes. It was easy to figure out which turns to take, and how much of our hike was left.

I ended up paying £51.90 for 12 months of access to their mapping.

All Trails

App Store link

All Trails Screenshot

Whilst Gaia had beautiful maps, All Trails helped us decide where we wanted to go. They have lots of trail reviews and pictures.

Unfortunately, All Trails doesn’t offer an iPadOS version and for that reason chose Gaia GPS over All Trails for downloading maps.

All Trails is an App Store Award-winning app, winner of the iPhone App of the Year. I can see why, the app has a great UX.

Garmin Explore

App Store Link

Garmin Explore Screenshot

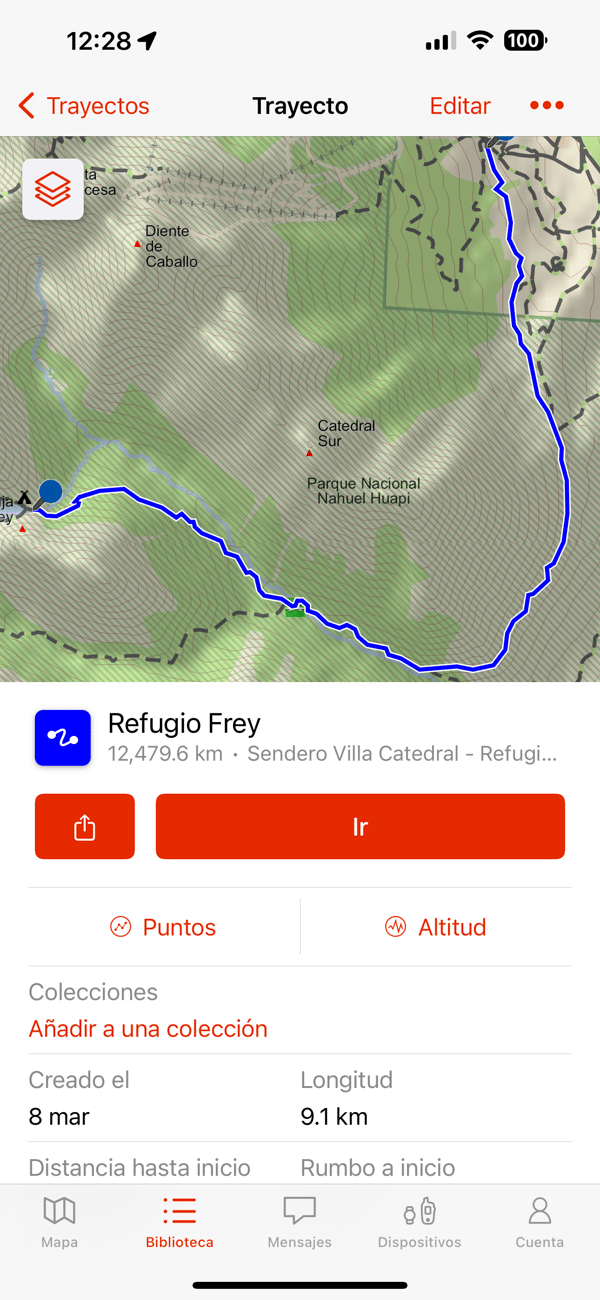
I wish I had discovered this app before our vacation. The maps themselves don’t look as good as either All Trails or Gaia, but the necessary detail is there. And it’s free.

Its killer feature is the tight integration with my Garmin Instinct. During an active hike activity on the watch, I could open Garmin Explore, find a destination on a trail, Garmin Explore would create the course, sync it to the watch and start navigating. Seamlessly. Then I could see ETA, estimated time remaining, and ascent remaining on my watch without having to take my phone out of my pocket. It worked great.

Garmin Explore has an iOS and iPadOS version. It’s available on the web via explore.garmin.com The maps are downloadable by region, so it’s easy to download everything you need before hitting the trails.


Travelling in Argentina Pt. 2 — Cycling in Bariloche

Photo of a hotel on an island surrounded by mountains

Circuito Chico is a ~20km road that is ~20km from downtown Bariloche. It is one of the main attractions in the area and offers spectacular scenery and it’s from there that you can access Colonia Suiza. A picturesque Swiss-style village. Cycling the Circuito Chico is often suggested as the best way to experience it as opposed to driving. My wife and I recently visited Bariloche and completed the Circuito Chico on bikes but it ended up being a day of frustration rather than one of relaxing in a gorgeous location.

Don’t cycle from Bariloche to Circuito Chico! It’s a ~40km round trip from downtown Bariloche and is not worth the time and effort. You might think, like I did, what could ruin a 40km ride near the banks of the nearby lake?

  1. The vast majority of bikes available for hire are mountain bikes. The bikes are heavy, the tires are slow MTB tires. A gravel bike would have been ideal. An e-gravel bike would have been better. I didn’t spot either of those along the way.
  2. You can’t see much of the lake along the way, so the ride isn’t very interesting.
  3. Worse. The road is busy. The good news is that the cars give you space. The bad news is that the buses don’t, they expect you to ride in the dirt. One bus passed me so close that I could touch the side of the bus.

It took us almost 2hrs to cycle 20km to Circuito Chic and by then we felt like we’d had enough. The stiff headwind didn’t help either

My advice would be to drive or grab a public bus to Circuit Chico. Then hire an e-bike at the start point. Circuito Chico is not flat! It has numerous short climbs with some tough gradients. Yes, we had a tailwind on the way back but by then we were too spent to enjoy it.

Check my ride on Strava


Travelling in Argentina Pt. 1 — Currency

TLDR: Bring dollars!

I knew the Argentina would present some unique problem when visiting due to the country’s financial problems. Inflation was over 200% and the peso was artificially pegged the dollar. Ahead the trip we bought $1000, a bit more than what we needed. I figured any currency leftover can be used for future trips to countries were the dollar is in demand.

On arrival we found using ATMs to be problematic in Argentina. The maximum withdrawl amount was capped at $15000 ARS and the charge to withdraw was over $8000 ARS. At the time $15000 was the equivalent of around 15 GBP. Not great.

Almost everywhere accepted contactless payment. I either used Apple Pay or Monzo card to pay for things. For everything else we used ARS, and dollars when we were short of ARS. Tipping is expected in the restaurants when service isn’t items on the bill/check/cuenta. The $1000 notes came in handy there.

In Buenos Aires there were plenty of people offering ”cambio”, but as a foreigner this didn’t feel like the safest option. The additional risk didn’t feel like it was worth the offer of a better exchange rate. Instead we used official cambios that offered us a "turista” rate that was marginally better than what the local were offered.

In hindsight I think we got things right. I’d recommend bringing dollars, and find a cambio to buy pesos when you have the opportunity.


@1password Is it possible to install/run 1Password in ~/Applications instead of /Applications ?
I tried moving 1Password to ~/Applications and it complains.


No matter what I do, Head Tracked Spatial Audio eventually re-enables itself on my 3rd gen. AirPods. Is there any way to turn it off permanently?


@stux Does mstdn.social intend to defederate with Meta/Facebook when that capability eventually arrives?


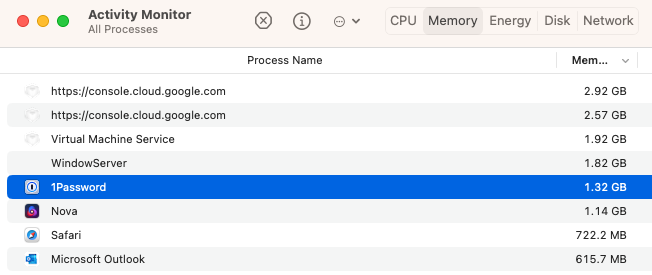
@1password What’s going on with 1Password’s memory usage. The main window isn’t even open.


@gruber I appreciated the The Talk Show Live intro. I waiting to hear ”Now, remember, you're All a big part of the show, So the better you are, the better John is.”


Training Peaks integration 😱


Holy crap! Apple Watch estimating FTP!? And connectivity to power meters! Still not sure why I’d ditch my Garmin bike computer.


Season 2 of TLOU has been green lit. That’s going to drag a bunch of people through the wringer. theverge.com/2023/1/27/2357444


Using @ivory has made such a difference to my consumption of Mastodon. As a long time Tweetbot/Twitterific user, the migration to Mastodon has been frequently jarring. Now I feel at home.


I’ve been on this planet for 47yrs and yesterday I discovered what that additional hole is used for on trainers. Heel lock. I tried it on this morning’s run and it’s a revelation! m.youtube.com/watch?v=1tPGJ3-m


That was great first episode. I’m already bought into Bella Ramsey as Ellie.


Strava’s UK price increase seems like a reasonable one. I’ve been a user for many years and I still think it’s good value. Especially when considering how other social platforms are run.


A tip for those individuals running K3s on RaspberryPi devices. Be wary of using MySQL as a datastore. MySQL performance can suck which in turn affects the stability of your K3s cluster.

I’ve installed etcd on a RaspberryPi zero, and it’s working great. etcd is smaller, faster, and more simple to run.